
 There’s a couple tutorials on the web about how to go about painting a bike frame using spray paints. Since a powder coat often costs $150 or more, many people opt to head over to the hardware store and give their bike a D.I.Y. paint job. However, it often comes out looking cheap and ugly because they use budget paints or don’t prepare the bike correctly first.
After discussing this with Lew Edinger of Memphis Bargain Bicycles, he was kind enough to re-write a tutorial I saw online to reflect his extensive experience painting bikes. Lew has carefully restored many vintage bikes and knows how to get a truly professional finish from paints and supplies you can get at any hardware store. Check out this tutorial after the jump, as well as some pictures Lew sent me of the finished results.
Read the full tutorial after the jump…
Stuff You’ll Need:
– Simple Green de-greaser
– Park Tools Polylube 1000 grease (for re-assembly of bike, available at your local bike shop)
– 220 grit Sandpaper
– Knifing putty (if you want to fix dents)
– painter’s masking tape & scissors or razor blade
– strong coat hanger or other method of hanging the frame
– well-ventilated spray-paint area
– respirator mask (if you’re inside) or at least a basic painter’s face mask
– clean, dry rags
– painter’s drop cloth or newspapers
– disposable rubber/silicone surgical gloves
– Dupli-Color Adhesion promoter clear primer (available at Auto Zone)
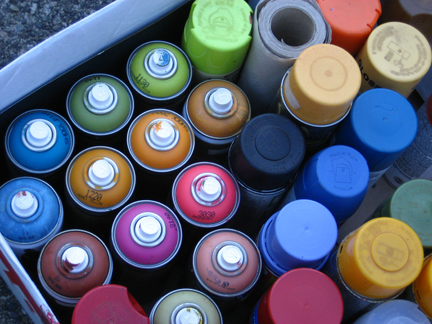
– automotive spray paint & clear coat (I recommend Dupli-color)
– Turtle Wax or White’s mild rubbing compound
Instructions:
- Make sure that you know exactly how to put back the bike when you take it apart. Take pictures and make notes. Be organized when taking your bike apart.
- Clean the bearings and internal mechanisms as you remove them. You will have a more thorough job in greasing them when reassembling the bike.
- Use a de-greaser all over the bike.
- Use 220 grit sandpaper to smooth the old paint. If your bike has a carbon frame, do not sand the carbon.
- Repainting your bike is also a great opportunity to fix dents. Use knifing putty to fill in dents. Sand it down afterward.
- Consider using matching touch-up to cover small nicks and scratches.
- Sand after quick-dry, and wipe down with de-greaser.
- Put on painter’s tape on pieces that you don’t want to be painted or should not be painted. These include the bottom brackets, the parts with the threads and the bolts themselves (but it is better to have them removed)..
- Cut tape to size to fit over decals to be saved.
- Use a de-greaser all over the bike (fingers leave oils behind.)
- Use an old and sturdy coat hanger to hang your bike from the head tube where you have a 360 degree access to the bike. Hold frame with clean, dry rag in one hand while hanging.
- Put on your protective gear.
- Spray on clear primer in thin, even coats, starting from the joints and the bottom bracket.
- You should apply multiple thin coats instead of one thick coat. Spray the project using thin multiple coats. Cover thoroughly during each coat, but not heavily in any one place. Begin and finish each pass off the object to be sure to get the edges. Release the button at the end of each pass. Use a side to side motion and overlap your spray pattern by approximately one-third.

- Once you’re done with the primer, within ** 5 minutes follow with 2 color coats, then 3 clear coats… Carefully remove tape on decals before applying the clear coats.
- ** DO NOT ALLOW PAINT TO DRY BETWEEN LIGHT COATS. THERE’S NO NEED TO SAND BETWEEN COATS! Properly applied, there will be no runs.
- Let paint harden for at least a couple of days to a week, then wax..
- Reassemble bike being careful not to unnecessarily touch or put finger pressure on the surface.
- After the paint is cured for at least 30 days, rub out overspray with mild rubbing compound (I use White’s), then wax again.
Here’s some more tips from Lew:
I always try to paint the same color as original. Carry the fork to the store when buying paint in order to get the best possible match. If I’m repainting to a different color, I strip the frame to bare metal, sand it down and degrease before starting to paint, again without sanding or allowing the paint to dry between coats as outlined above.
Make sure paints of different brands are compatible with each other by comparing the chemical ingredients, do not mix lacquers with enamels.
Following my proven procedure of laying one coat on top of another avoids the problem of “lifting” the previous coat. Follow instructions on the can. If you somehow fail to keep painting withing the time allowed for the next coat, allow at least 7-10 days drying before attempting to proceed (the longer the better).
And here are some bikes he’s painted:


Thanks again to Lew for his help in putting this guide together. As you can see, if you follow this tutorial carefully, you will get really impressive, professional results. Like any craft, the secret is care, attention to detail, and patience! It takes a week to do it right, but your bike will look as good as new.
Great job, Simon. You deserve credit for improving on the “tutorials”.
One further comment re: degreasing:
Instead of Simple Green which requires washing after use, I found that JASCO TSP, No Rinse Substitute, in a 1 quart jug at Sears is easier, actually cleans better.
As stated on the label, a “Liquid Concentrate One-Step Cleaner & Deglosser.”
It wasn’t very expensive, either.
Just apply with clean terry cloth following instructions, wipe with another clean cloth or allow to air dry. I also use pressurized air nozzle on my compressor to finalize cleaning & drying. Doesn’t take long, you’re reasdy to apply primer.
December 5, 2009.
Hi,
I just want to say thanks Naptrax and Lew for this wonderful article and tutorial. I was very disappointed about my bicycle paint jobs. The paint chips very easily. And it is really hard to keep up along the whole paint process. I found in your tutorial the answers to my problems. I will put on practice you method.
Congratulations for this excellent job.
Sincerely
Martin Ortiz
North Vancouver
Canada
1st of all , catnip . Dope playlist to learn to =D. Word .
Props to Lew for open sourcing his experience and knowledge . The details the 2 of you include are priceless . Huge headache and time savers. Big Ups !
Jojo
N.Seattle
Man powered & Bionx rider
I have an old school bike I'd like to fix up. There's rust on the handle bars, how do I fix this?
How many cans of paint/primer should do the trick?
Hi Sheila, i suggest you use one can of primer. I usually also use one can of paint for the top coat, but it depends on the size of the can. The fancier Duplicolor brand paints come in smaller cans, so in those cases I use two.
Thanks for all the tips! Gonna go for it. Just one confusing part. You said it is worth it to wait a week. If it takes 30 days to cure can i not ride for a month? I ride 3 days a week to work.
Pingback: 3Resho Super Record Export Aero Road Frames – Complete Restorations « djcatnap.com
Wow you paint bikes nearly exactly how I paint them even using the same paint! The only thing I do differently is I don’t usually repaint the entire bike with “color”. Instead I’ll sand down the paint chips and rust spots to bear metal locally. I then go down to auto parts store with frame in tow and match the color as best I can. Then I focus my “color” spray on these spots and over-spray beyond them to blend in the color. I’ll clear coat the entire bike though.
How has your paint job’s held up over time?
I feel better doing it this way so if the paint flakes off it’s the same color underneath. I wasn’t sure how durable the paint is compared to powder coat long term. I would feel like a sleazy used car sales man if the paint flaked off in month and it was a different color underneath. Also if the frame only has a couple paint chips I’ll cover the components with Glad Cling Wrap if I wasn’t planning on doing a complete rebuild.
ihave two old vintage schwinn, spirit , they need to be restored. the problem is the schwinn decals.So should i masked them off and try to paint the spots between the decals after color and clear coat. What is the best way thank you
“Once you’re done with the primer, within ** 5 minutes follow with 2 color coats, then 3 clear coats… Carefully remove tape on decals before applying the clear coats.”
Just want to clarify, does this mean you need to get those 2 color coats and 3 clear coats in that 5 minutes?
Or after 5 minutes from finishing up the primer, you go do the color coats then wait another 5 between coats until you finish with the clear? Thanks
I have a question about which type of paint to get. Do I get a primer can and a color can or get the one that has both of them in one. Is there a quality difference when you apply the primer on it’s own compared to have the primer with the paint? One another question, Should I take off all the paint until it is the bare metal so I can get the best quality? Thanks.
To James Shermer: You can’t really repaint a frame and still keep the original decals. However, if you go to eBay and look for the seller “VeloCals”, you’ll see they sell reproduction decals for your Schwinn.
To KD: wait 5 min between coats
To Ulises: Get separate primer and main color. Yes there are some that are dual-purpose, but they are low quality and not a good choice for a nice finish on a bike. Use Duplicolor automotive paint for the main color. And yes you should strip a bike down to the bare metal for the best finish and paint adhesion.
I have a question about painting a bike indoors what would you recommend the best temperature to be and does it matter if it’s like a propane Heat?
Oh one more thing that’s for the clear coat does it have to be Dupli-Color?
Hi June, I prefer to use the same clear coat as the manufacturer for the regular paint. So yes, I used Dupli-color clear. However you can use other brands. I recommend testing it out prior to putting it on the bike though. One time I used a clear coat that ruined the under-coat of paint and I had to start all over again.
The indoor temp should not be below 60 degrees Fahrenheit. Paint dries slowly or unevenly in cold weather. The source of the heat does not matter.